Specifically my van.
But, I have been carving away at some neat little projects lately and thought I would give you, dear reader (and there's is only like two of you, so readers), a glimpse at a very special engine I have been asked to build.
I also have been building my flattracker, but that's not I want to show you (right now)...
This project: Build a 93 inch, high compression, competition based shovelhead with a twist. This engine will be built with two FRONT cylinder heads, thereby allowing true twin carbs. Easy to say. Harder to pull off.
Oh, and this engine is for a friend building another sled for Born Free. So craftsmanship and finish is just as paramount on the outside as the quality I am putting into the inside. The last two years I have been involved in some small way to provide bits to machines involved in the Born Free.
I am humbled and honored to be involved now for the third year in a row and stoked to be working on this project!
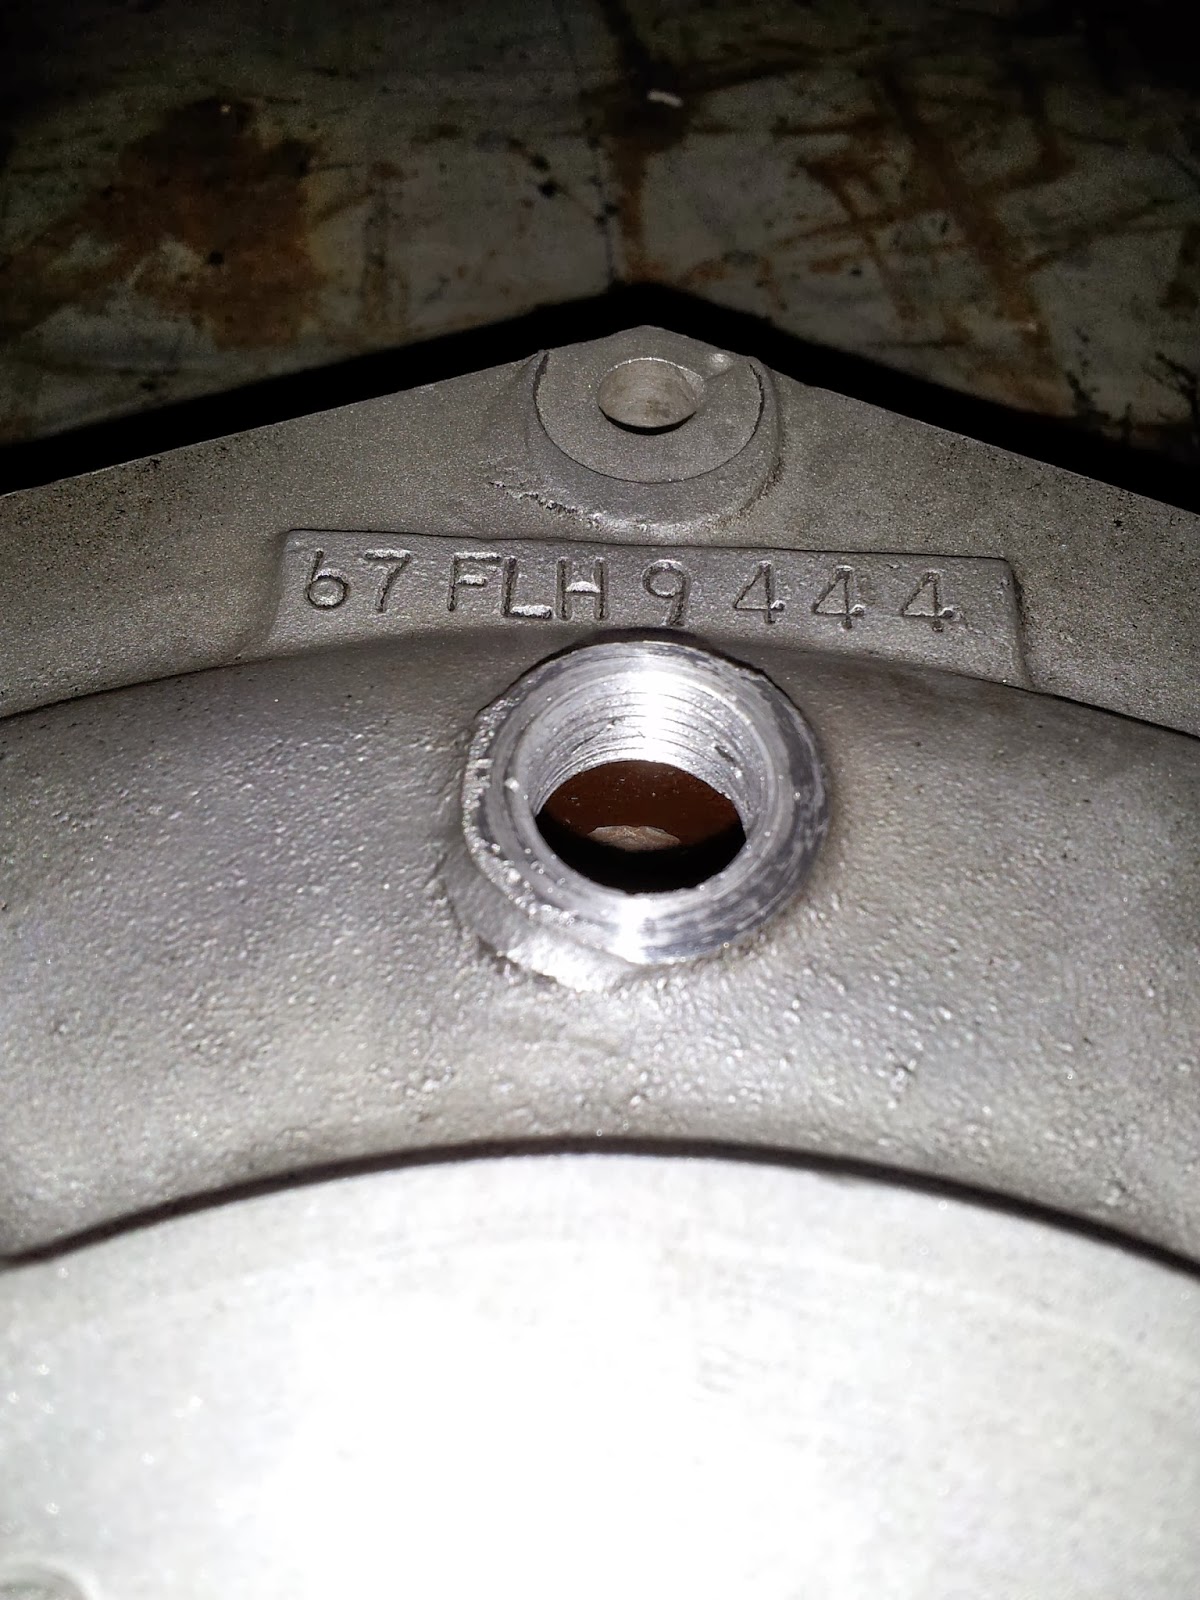
The engine is a 1967 FLH, 74 ci flatside (generator) shovelhead. Please refrain from calling it a pan shovel, thank-you.
This episode is how to bore a set of cases using a Bridgeport. Enjoy.
It arrived disassembled. Mostly as the lower, sans wheels and rods. Stick around and you will see why it wasn't complete.
The cases were at one time black wrinkled. I really enjoy wrinkle finish, until it gets dirty, dusty, oily or generally exposed to any element outside. then it holds onto every one of those contaminants and doesn't let go.


The cases were broken down and then walnut stripped in my Trinco blast cabinet. Walnut shells are awesome for this kind of work. They strip paint and gasket material (and the little crusty spots of chopper dirt) off well, but leave the patina on the cases and any cracks will be readily apparent.
The timing hole was stripped out. Other than that, no major issues. Good set of cases. Kind of a shame to modify them. One less pristine set out there I guess ( take that you purists!!)
A little prep, a little weld, and a little mill work to fix that wagon.


Then after being tempted to put them in my dishwasher, I was vetoed by the missus and just solvent cleaned them, with specific attention paid to the inside case surfaces.
Once clean and dry, the masking began.


And the other case was masked.


I proceeded to apply my special sauce. This is a "baked" coating so into my oven it went. (The one in my garage, not the kitchen). This stuff leaves a bit of a fragrance when baking out- the garage stunk for days!


Now, onto the good stuff.... This engine is to become 93 inches. To do that, there are two ways, really increase stroke and keep bore the same (which has it's advantages, namely keeps the case webs thicker) or really increase bore and increase stroke. This engine is getting the big bore treatment- remember in engine building, every build is a compromise in some fashion or another. There is no replacement for displacement, after all!
So, let the chips fly.
First off- fixturing. The cases need to be mated together, so the mating seam was lapped to opposite case so that the cases truly nest into each other perfectly. (And, obviously, the mill spindle is squared and trammed to the table to ensure perpendicularity.)

Then the case halves are bolted together and fixtured to the mill.
The first step is to indicate off the surfaces in X and Y to ensure the cases are true to the spindle. As these set, they were solid to about two thou. A face mill is used to then clean the deck up and face it perfectly flat. Just a kiss here. No need to take anymore than is necessary.


Once the deck is done, then the bore is aligned to the spindle.


And out comes the boring bar. Little by little, the bore is opened up.


Then after the final bore diameter has been cut, another boring bar is used to chamfer the bore.
After a bit of vacuuming, the fixturing is removed, and the spacer indexed over 45 degrees.
Followed with all the same shit from above, just on the rear cylinder pad now.


After the cases have been bored to size, chamfered, threads chased, passages swabbed and blown out, then I put a little kiss on the outsides to really make em pop.


